For my first several motorcycle tours, packing for the trip was an event unto itself. When I began doing overnight motorcycle trips regularly, I developed a method to simplify the packing process that saves time and reduces pre-trip stress.
As I was developing the method, I nicknamed it, “Add Clothes and Go,” because attire is the only thing I don’t leave in my luggage all the time.
It’s more than a packing strategy; it includes practices that shift some packing duties to the riding off-season and emphasizes the use of checklists and visual memory to ensure no item gets left behind.
Here are the five pillars of “Add Clothes and Go”:
1. You don’t need to wait to pack most items
Other than clothes, most items you take on a motorcycle trip don’t need regular care.
Look at one of your typical trip packing lists — or sit down and make one if you don’t have one. For anything that isn’t clothes, make sure you either have one of it to set aside for your motorcycle luggage — or buy a second one.
For example, if you usually pack the toothbrush and toothpaste you have sitting next to the bathroom sink, go to a dollar store and buy a new toothbrush and travel-size tube of toothpaste to leave in your luggage. Do this for anything that isn’t a shirt, pants, shorts or socks.
I keep a separate toiletries bag in my motorcycle luggage, as well as two small bags for tools that don’t fit under my bike’s seat. I’ve also designated a hat or two, USB power banks and sunglasses that stay in my luggage all the time.
There are a few more expensive items that you may not want to buy a second edition of, such as a laptop or tablet. For those items, I make sure I have all the cords and accessories I may need in a bag. I have each accessory listed my packing list and visually check to make sure they’re all there as I place the bag into my luggage while packing.


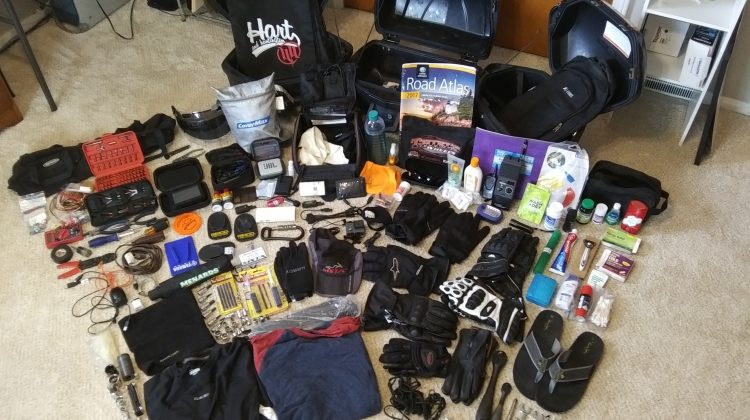
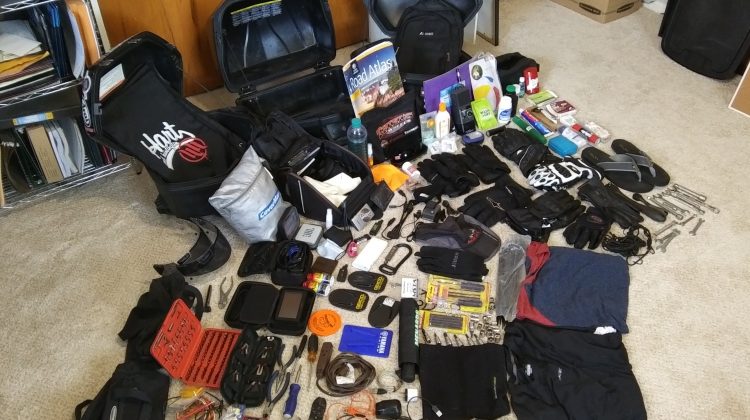
When you have everything sitting in front of you on the floor, you’ll have assembled your “touring kit.” I do my best to not borrow things out of my touring kit between trips so that I don’t spend time trying to track them down while I’m packing.
2. Figure out how to best pack your touring kit
After assembling your touring kit, you’ll need to figure out the best way of packing it in your luggage. Motorcycle luggage comes in a variety of shapes and constructions, so there’s no hard-and-fast rules for how to best pack.
The key guidelines you’ll want to follow have to do with weight distribution, the dimensions of items and when you use an item on a trip.
To help a motorcycle handle well, it’s important to keep heavy items as low as possible. This helps when you need to change direction with the bike – such as when you’re riding on a twisty road. If you use saddlebags or hard side cases as part of your luggage setup, consider placing heavy items at the bottom of those bags.
If you’re using saddlebags, you’ll also need to make sure the bags are evenly loaded in terms of weight. If you put all your heavy items in one bag, your motorcycle may handle awkwardly in corners.
Some items, like a laptop, may not fit inside your saddlebags or side cases and will need to be packed in a top case or tail bag. If so, try to pack it as low in the bag as you can.

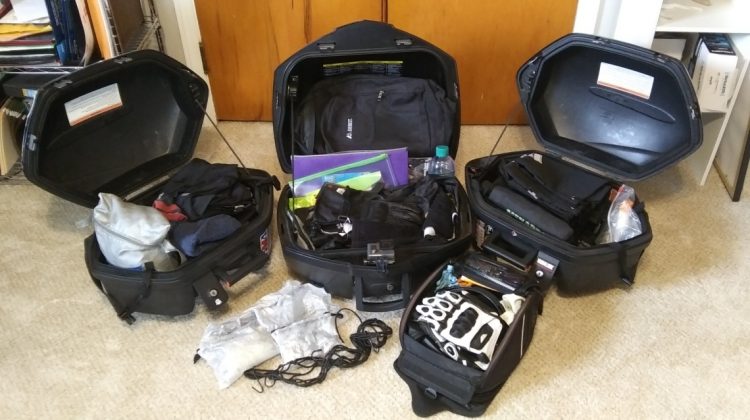
Some items you may only use while you’re out riding, while others you’ll only use once you’ve reached your destination for the day. I try to pack items I don’t use on the road (e.g. toiletries bag, drawstring bags, flip flops, etc.) and items I hope I don’t have to use (such as tools) in my side cases.
Items I use on the road – such as my water bottle, camera and hats – I pack in my top case for easier access when I’m stopped. I save space in my tank bag for items I’ll use while seated on the bike or that I need quick access to – such as USB power banks, extra face shields and spare change.
Once you think you have your bags packed as best you can with all your non-clothes items, you’ll need to do a test ride to see how the bike handles. Even if the bike feels like it’s handling fine, try moving a few things around and go out on another ride – just to make sure your first ride really is the best arragement.
When you have all the non-clothes items packed to your satisfaction, leave those items in your luggage. They’ll be ready whenever it’s time to hit the road.
Also, take some time to make a checklist of the items in your kit, as well as which piece of luggage you’ve packed them in. Use that list to double check that you have every item in your touring kit before each trip.
View an example of a motorcycle packing list.
3. Adding clothes
With your bags already packed with all non-clothing items, you just need to add clothes when it’s time to get ready for a tour.
The same principles for packing non-clothes apply to clothes packing. Try to keep heavy items closer to the ground and make sure saddlebags or side cases remain balanced. I use the “pick up test,” where I pick up my side cases one at a time to check how heavy they feel. If one feels significantly heavier, I move items around until there isn’t a noticeable difference.
Since clothes aren’t (usually) something you need to access during the day, I pack as many of my clothes as I can in my side cases. I usually stuff socks and underwear into nooks and crannies between other items and layer shirts and pants on top non-clothes items. Occasionally I have to pack a pair of jeans in my top case due to running out of room in my side cases.
As clothes get worn during a tour, I use drawstring bags as laundry bags to separate dirty clothes from clean ones. Eventually, one of my side cases becomes the “dirty clothes” bag.
When I get home from a tour, I empty all the clothes (clean and dirty) out of my luggage, but leave all the non-clothes items packed and ready for the next trip.
4. Putting the riding offseason to use
I use the winter months to check, replenish and update my touring kit. Each February, I print off a copy of my checklist and go through every item in the kit. I check the condition of each item and identify anything that needs attention.
For example, I check each box of over-the-counter medicine in my toiletries bag to make sure it won’t expire before the riding season ends. I also check items like batteries and replace any quantities I used during the previous riding season. Electronic items like my CB and weather radios and power banks are tested to make sure they’re still in working order.
I also take a moment to consider removing any items that I didn’t use during the previous year, as well as resolve any issues I had with accessing items during the previous riding season.
By doing this during the offseason, I don’t have to run to the dollar store or grocery store during the packing process to buy new items.
5. Experience makes the difference
After you’ve done a few tours with your touring kit and packing setup, you’ll start to remember what items are supposed to be in each bag. This makes packing up in the morning before hitting the road a lot faster, as you’ll start to quickly notice if something is missing.
Experience also helps you fine-tune your touring kit. Each winter, I make small revisions to my packing list based on observations I make during the previous riding season.
I’ve added some items to my list over the years – such as a Bluetooth speaker and spare fuses – and have come up with little tweaks to my packing arrangement. I used to carry anything electronic in my top case, but moved some of the lesser-used items like my CB radio and weather radio to my side cases. The result was more room in my top case to add a water bottle, a camera and more sets of riding gloves.
